News
PayAnywhere Inside 5.0 - Build Your Library
News
With all of the great features we’ve thrown at you recently, we thought it would be a good idea to walk you through each section of the revamped PayAnywhere Inside. In the Library section of PayAnywhere Inside you are able to add and edit items, create modifiers and discounts, manage stock by tracking items sold. Learn how to use the Library section to create and inventory and manage stock below:

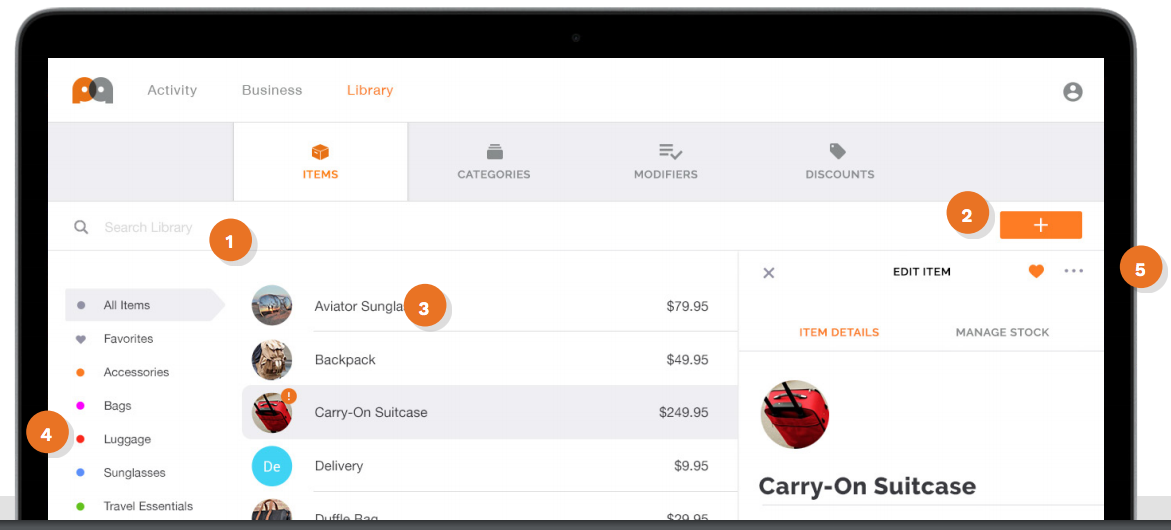
Items - Create sellable products with multiple variants.
- Search - Enter an item name, price name, barcode number, or price to filter results.
- Add button - Create a new item.
- Quick add - Simply enter a name, price, and press enter. You can also set default tax and category options.
- Category filter - View all items or filter by assigned category.
- Item options - Mark as a favorite, or remove from your library.

Item details - Create endless variations of your items with powerful customization options.
- Basic info - Enter an item name, select a category, and assign an optional photo.
- Multiple prices - Enter at least one price and an optional price name, or add several.
- Barcode number - Enter an optional barcode number for each item price.
- Tax and modifiers - Assign optional tax and modifier sets that allow customization at the time of sale.
Manage stock - Track your inventory and sync quantities across devices. Just enter the stock on hand for each price line. Items with 0 stock will be unavailable to purchase.
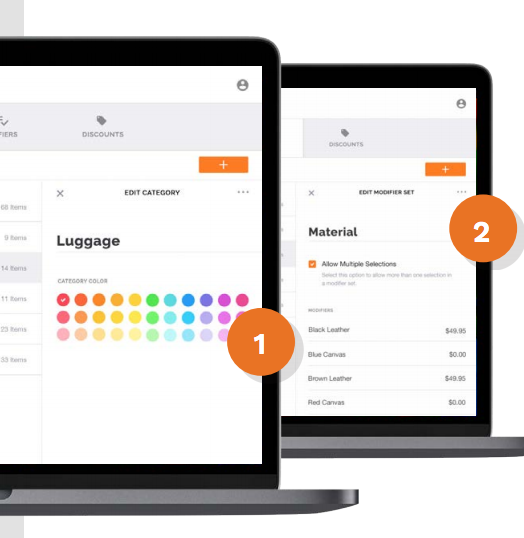
Categories, modifiers, and discounts - Organize and customize your item library.
- Categories - Create color-coded groups to organize your items.
- Modifiers - Create sets of options that can be assigned to items and selected at time of sale.
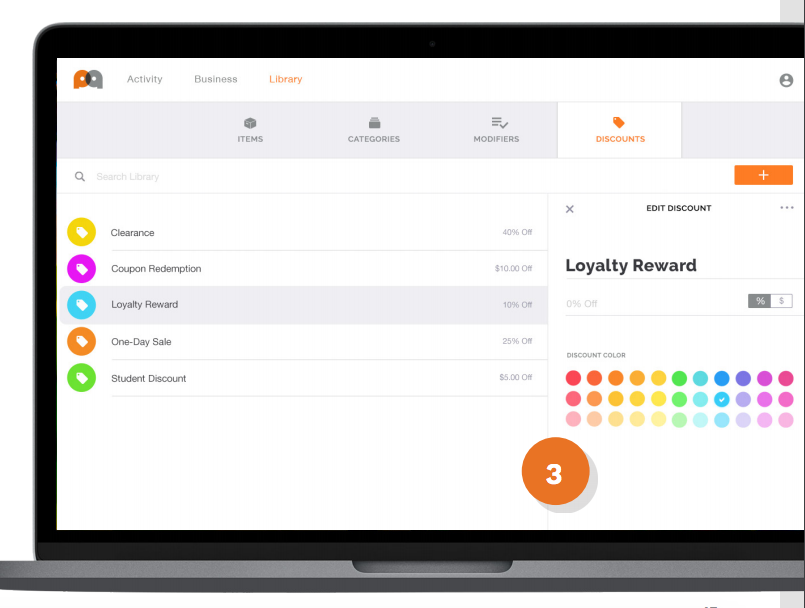
- Discounts - Create color-coded dollar or percentage-based discounts.
Log in to PayAnywhere Inside and get to work!
Start your Payanywhere account.
 |  |  |  |  |  | |
|---|---|---|---|---|---|---|
Payment types | ||||||
EMV chip card payments (dip) | ||||||
Contactless payments (tap) | ||||||
Magstripe payments (swipe) | ||||||
PIN debit + EBT | ||||||
Device features | ||||||
Built-in barcode scanner | ||||||
Built-in receipt printer | ||||||
Customer-facing second screen | ||||||
External pinpad | ||||||
Wireless use | ||||||
Network | ||||||
Ethernet connectivity | With dock | |||||
Wifi connectivity | ||||||
4G connectivity | ||||||
Pricing | ||||||
Free Placement | ||||||